Start: 5/1/11
Finish: 9/14/13
Total Time: 230 Hours
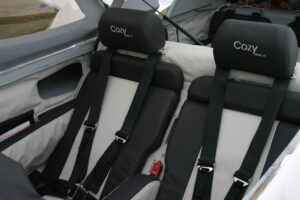
With the plane almost ready for first flight it was time to start fabricating the seat cushions. We knew we wanted a light grey and charcoal 2 tone leather scheme for the fabric, but with little experience in this area we decided to first try our hand at it using cheap vinyl.
Christine worked out the patterns on the computer and printed them full size for use in cutting the vinyl ‘test skins’. After sewing the skins together and a little trial and error at getting the foam into them, we had the Pilot seat ready for flight testing. The remaining seats we can work out during the phase 1 test regime.
As we continued our flight test program, we continued to make adjustments to the patterns for the seats and interior panels. We also spend an exorbitant amount of time looking at various options for leather. After reviewing what seemed like a million different samples of leather, both real and synthetic, we finally settled on a synthetic from Kovi Frabrics. We decided on a two tone, light/dark grey combination comprised of #K8719 and #K8721. They are very soft, and were the lightest weight options we could find, while still being durable.
A few flights in below freezing temperatures about the time we ordered the fabric led us to the idea of installing electric seat heaters while doing the final upholstery. The pilot seat turned out nice, and the heat pads work well. Should make cold weather flying more tolerable.
After months, and months, and months of adjusting patterns, re-testing, the interior finally came together. We had a bit of embroidery work we wanted done. So we brought those pieces to AST Sports in Monticello, MN. They did great work ensuring that placement and sizing was exactly as we specified. One of the last finishing touches we added was an LED screen in the back seat so Ella could watch movies. What a spoiled little girl. 🙂
UPDATE: 09/20/2015
One of the things we’ve learned after taking the Cozy on a number of long cross country adventures is that making the most out of the space in the baggage area of the strakes is a bit difficult. The ‘baggage area’ is rather oddly shaped, so you’re not fitting most luggage or even duffle bags in it very efficiently. We also need to utilize this space for things like hats and books and tablets and….you get the idea. So after many many hours of discussing what would be the perfect ‘baggage’ for this oddly shaped spot, we decided to make our own set of custom duffle bags that easily fit the strake baggage areas and still allowed us a little room at the front and back for the aforementioned ‘personal items’. We discussed using the same material as the seats, but ended up deciding on the same rip stop nylon that we made our custom cover out of. Turned out pretty good.


