Start: 01/10/07
Finish: 02/25/09
Total Time: 102 Hours
With our boat (a.k.a. fuselage) now sporting an airfoil in the front, we move on to building the nose cone, and installing the retractable nose gear. We were a little late with ordering the nose gear retract actuator and some of the nose cone hardware, so we’re starting a little out of sequence with the work, while we’re waiting for all the parts. We decided to use the electric nose lift from Jack Wilhelmson, as it is the most compact unit available, and the manual crank system specified by the plans does not appeal to us.
We start this chapter by fabricating the NG30 bulkheads, which protrude forward from the F22 bulkhead to the F0 bulkhead, and supports the nose gear and part of the rudder pedal system. We must reinforce these bulkheads at the nose gear pivot point MKNG6, as well as at the actuator attach points.
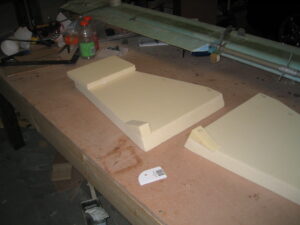
After applying a reinforcing layup to the MKNG6 pivot location we turn the bulkheads over and glass what will become the inside surface. After this cures, we clamp the two NG30s together and true the edges to each other. This is where we discovered we had accidentally made two left sides instead of one right and one left. After deciding that trying to remove enough glass from the incorrectly made piece to repair it was going to take just as long as remaking it, we cut another NG30 bulkhead from foam. This was on a Saturday morning and we very much wanted to continue on with our work. In an effort to speed up the curing of the newly made bulkhead we decided to try putting it in the oven. A couple of posts on the builders forum suggested that post curing in an oven at 240 degrees for about 40 minutes would yield a strong part. Unfortunately, with only one side of the bulkhead glassed, the foam core warped as the layup cured. So after 2 hours of building a new (correct this time) bulkhead, we had yet another scrap NG30. We again cut another NG30 from foam and proceeded with the appropriate layups. This time we let it cure at room temp. It’s possible that a lower temp like 170-180 degrees might have worked without warping the foam, but we didn’t want to risk another setback. We will likely test the 170 degree curing process on some scrap foam when time permits. It would be nice to be able to quickly cure small parts instead of waiting overnight.
After waiting for the 3rd attempt at the right side NG30 to cure we laid up the 15 ply reinforcing hardpoints for the landing gear retract mechanism and floxed on the MKNG6 birch and aluminum hardpoints. The layups over the entire outside surface and hardpoints are then done. We then cut the NG31, NG32, F0 and F5 bulkheads, which also make up part of the nose cone support structure.
The last steps we could complete until we have the retract mechanism for the nose gear were to glass the nose gear strut with a 2 ply bid torsional reinforcing layup, and cut the foam that will make up the fuselage side between F22 and the nose cone. We thought perhaps we had been able to scrounge up enough work in chapter 13 to keep us busy until the nose retract arrived despite our lateness in getting it ordered, but it seems we were more efficient than we thought we were. We suspect the retract will be here in a couple days, so in the mean time we’re going to jump ahead to chapter 14 and begin building the jig for the center section spar. We’ll return to the nose gear tasks as soon as we have the parts to continue.
When the nose lift arrived we proceeded to fit it to the NG30 bulkheads. The MKNG6 pivot point was also fitted to the bulkheads, and the strut was floxed to the MKNG6. The NG5 backing plate is then bolted and through and floxed to the strut. The NG3 and NG4 lift attach brackets are then floxed onto the strut and clamped until cured.
Next the NG30 bulkheads are assembled with the F0 and F5 bulkheads, and floxed onto the fuselage. Then the NG31, and NG32 bulkheads which make up the very front of the nose are floxed into place. The floor is then microed into place and glassed. After cure the sides are also glassed and microed into place.
After the sides are cured, reinforcements are added to the canard lift tab area, and the rudder pedal pivot blocks are installed and reinforced. The rudder pedals are then installed. We’ve opted for the adjustable rudder pedals from Dennis Oelmann. They are a very nice set, powder coated in white. The powder coating does create a coupe issues as well though. Anywhere that a machined fit takes place, the powder coating interferes. This means one must carefully sand and polish the powder coating away at places such as the brake cylinder arms, the CS13 bushing holes, and even where the left and right halves of the pedal assemblies slide together. It’s not a big deal, just had us a little confused at first as to why things weren’t fitting correctly.
After the pedals are mounted we install the master brake cylinders. There are instructions in Newsletter #64 on how to install lay down brake cylinders, such as the Matco cylinders we are using. However, a number of people have told us that this procedure doesn’t provide for very authoritative braking. We decided to devise our own method by making brackets similar to the ones used to mount the landing brake actuator to the the landing brake. Two aluminum L brackets attached to a plywood hardpoint would comprise an assembly we could flox and glass to the floor of the nose. We were concerned about having to stomp on the brakes hard some time and having the flox break away between the L brackets and the plywood hardpoint, so we also installed a flush mount 10-32 bolt through the plywood hardpoint and into the aluminum bracket. In order to make certain that a nut on the top side of this bolt wouldn’t interfere with the brake cylinder, we decided to tap the aluminum bracket instead of using a nut, allowing us to grind the bolt flush with the top of the bracket. This worked very well. We test fitted the bracket/hardpoint assembly to the floor to find a position that allowed for maximum movement of the rudder pedals, without interfering with the nose cone sides. The nose floor and NG30 bulkheads were sanded in the area where the bracket would be installed, and the location marked. Then we floxed the brackets to the nose floor, and laid up 3 inch wide, 2 ply BID tapes over the top of the hardpoint/bracket assembly. This reinforcing layup overlapped onto the nose floor, and NG30 bulkheads by about 2 inches. When cured, we had nice, solid mounting brackets for our lay down master cylinders.
At this point we again find ourselves in need of parts. We opted to use the Matco nose wheel (as our main gear and brakes are Matco, it made sense to use their nose wheel as well), which requires a different sized axle spacer to fit the Cozy IV nose wheel fork. CG Products (aka CozyGirrrls) are making these spacers for us, and currently have our nose wheel for fitment. When we receive the wheel and spacers from them we will be able to continue on with final fitment and contour of the nose. For now we’ll jump back to chapter 14 again to keep us busy.
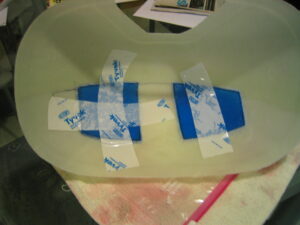
We determined that rather then use the plans location landing light, which is on the belly of the plane, we would put landing lights in the nose. We followed the idea from Marc Zeitlin to use 1/8″ plexiglass to create lenses in the nose cone, and mount automotive style driving lights to F0. The first set of driving lights we purchased for this purpose appeared to be a nice projector style, with thick lenses. What we didn’t realize until opening them up and test powering them was that the lenses were ion coated, producing a very dim, yellow beam. We use the term ‘beam’ loosely though, as they were not very focused, and could barely illuminate the garage wall 15 feet away. They seemed more like fog lights, despite the package stating they were driving lights. We were very unhappy with them and were not about to waste time installing them, so we did a little shopping, and purchased 2 more sets of lights which we would compare side by side to determine which set to use. One set was procured at WalMart for about $37. They were made by Pilot, and listed as 4″ round truck/SUV driving lights. The other set we found at Checker Auto for about $42. Made by Blazer, these lights were a smaller elliptical design, though the sales associate claimed to have them on his vehicle and was very impressed with them. We hooked up both sets of lights and turned off the overhead lights in the garage. Both were very bright, white light, and clearly better suited for the job. The Blazer lights were more focused, however and thus did a better job of illuminating a particular spot. The Pilot lights, while still very bright, were not as focused, and seemed to have a lot of light loss due to the scattered beam. We decided the Blazer lights would be our choice, and began working on how to install them. We decided to use the included brackets to mount them to F0, and to notch the NG31 bulkhead so that we would be able to access the mounting screws from the side to remove them if we had to change a bulb, or light assemblies. We then fitted the nose cone loosely with tape, and shining a light through the nose cone door, were able to locate where the lights would need to have lenses installed on the cone. We marked the nose cone, made a template from paper, and cut out slightly oversized pieces of plexiglass. Next we heated the plexiglass in the oven for 10 minutes at 300 degrees, and using oven mitts, held it in place over the nose cone, shaping it with pressure. This created two lenses we can install into the nose cone to allow the light out. We then cut the openings we had marked on the nosecone, beveled the edges of the clear lenses to a 45 degree angle, and installed them into the nosecone with flox. We then painted the inside of the nosecone satin black to reduce glare, and to avoid having our plane look like Rudolph the white nosed reindeer when the landing lights are turned on.
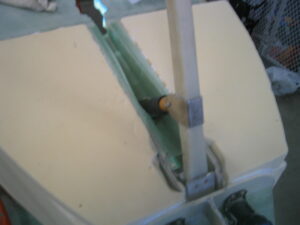
Though still needing a nose wheel, we decided to proceed on as best we could with fitting the nose gear retract mechanism. We’ll have to hold off on installing the wheel well, and may need to make a little adjustment to the limit switches once the nose wheel is fitted, but getting the retract mechanism in place will allow us to continue on with shaping the nose. We ran into a little trouble when installing our nose gear strut and NG6 pivot bearing into the NG30 bulkheads. When we installed the sides, we apparently didn’t carve enough foam away from the inside surface, so there wasn’t enough room between the NG30 bulkhead and the nose side to fit the long bolt through the NG6. We grabbed the right angle die grinder and attached a cutting wheel to it, then carefully cut away just enough of the inside glass and foam to allow clearance for the bolt. This would then require repair later, though it was a very simple matter of sanding the area smooth and re-glassing with overlap.
The Wilhelmson nose lift brackets ship with 2 of the holes undrilled so that you can match drill to your install. In order to locate these holes properly, we installed the strut and the nose lift (taking time to slot the strut cover at this point as well), and actuated the lift through the full range. This allow us to position the nose lift brackets correctly and use our existing holes in NG30 to locate the holes on the brackets. Once drilled we bolted the assembly together, extending and retracting the nose gear strut automatically for the first time.
Click here to the video of the nose gear strut retracting.
We then cut the foam block from the top of the nose, and began shaping the bottom and sides of the nose. At this point we realized that it would be a good idea to paint the interior of the nose now, while it was still easy to access. Once the top was in place we would have access to the interior of the nose only through the nose access door and the foot wells at the rudder pedals. The plans call for the use of Zolatone, which is a fleck stone style of paint used in commercial building interiors. The fleck stone appearance didn’t appeal to us, as we’ll be using leather, carbon fiber, and brushed aluminum in the interior trim work. We still wanted to paint the interior as well though, being there would be areas that are not trimmed out. In order to provide a durable finish we selected an acrylic urethane single stage paint, with a flattening agent to remove any gloss. To provide good adhesion we used an epoxy based primer, which we reduced down and sprayed lightly so as to not add much weight. With the interior of the nose painted, we reinstalled the rudder pedals, master brake cylinders, brake fluid reservoirs, and nose lift.
We then shaped the exterior of the nose bottom and sides, then glassed the nose bottom. The plans nose bumper is typically installed at this time as well, but we’re going to use a slightly different nose bumper which will be installed after the nose is completely glassed. We also installed the static port at this time. Our static port is slightly different than plans, which calls for inserting some aluminum tubing into the fuselage side and drilling 3 small holes in it from the outside. We wanted to install a more conventional static port.
With the bottom of the nose complete, we flip the fuselage right side up again, and shape the nose top. There is a template created form the M10 drawing that you can use to contour the top, but we found that the template was too short. The plans indicate that the nose should be highest in the middle, so we drew a centerline from left to right, then drew two lines parallel to it an inch fore and aft. We used these lines as guides when using our 24″ sanding block, and carefully rounded the nose to a shape we thought looked correct. With the nose shaped correctly, our next step was to layup 3 plies of bid for the nose door, cover the top of the nose with box sealing tape, and lay the nose door layup on the tape. This allows the door to cure to the correct shape of the nose, but is again removable so we may add some additional layups and properly carve the foam recess for it to sit flush on the nose.
Long Pause….
A very sad truth about homebuilt airplanes is that life seems to get in the way of building. The list of excuses for the lack of serious progress over the last few months is as long as it is pointless. What we can say is that the plane never leaves our thoughts and discussions. Every day we aren’t able to work on it we at least spend some time complaining to each other about the lack of ‘plane time’. It’s taken a month or so to really get ourselves back on track, so we’ll start back in with the lights…
Having previously selected and installed our landing and taxi lights, there was a little finishing touch that needed to be taken care of with them. The landing lights on most of the planes I’ve flown are sub-optimal at best. When we turn on our landing lights we want to actually SEE the runway. The automotive industry has turned to H.I.D. Xenon lighting for it’s superior brightness, reduced heat, and reduced current draw. This seemed to us like technology that needed to make it to general aviation sooner rather than later. We purchased a H3 HID retrofit kit from an online retailer, though we were a little skeptical as to the quality of the components we would receive. When the kit arrived however, it appeared to be of good quality, and test runs indicated a rather impressive brightness from the retrofit. We found a handy location for the ballasts and inverters, and replaced the halogen bulbs with the new H.I.D. bulbs.
Installing the Pitot tube involved simply routing out a little foam and floxing it into place. We had a little trouble getting the hole located in the nose cone, but with a little trial and error, and a little repair after the fact all is situated well with the nose cone now.
We find ourselves coming back to this chapter in down times from other chapters. One of the small changes we’re making is to install gear doors for the nose wheel well. Wayne Hicks has a great write up on how to make these simple and inexpensive.
We found we had to spend a little time playing with different spring lengths and diameters before we arrived at a solution that created a pleasing closing action, but the end result was a simple and effective nose gear door system.
Video of the door actuation can be seen here.
Before putting the nose cone on we wanted to get the wiring for the landing and taxi lights situated. Being we’re now in the process of doing that we realized that we need to fabricate our nose bumper mounting brackets so that we’ll be ready to affix the nose cone when the wiring is complete. A couple of 15 ply bid tape brackets will provide the mounting tabs to secure our metal and plastic nose bumper.
Next we drilled the brackets, nose cone, and skid plate at once to ensure proper alignment of the bolts. Then taped the skid plate for a pair of AN3 bolts. The bolts reach from the top of the brackets, through the nose cone, through a flox pad, and screw into the skid plate. Then the nose cone is bid taped to the nose sides, thus FINALLY completing this chapter. Though on paper it took 2 years to complete this chapter start to finish, the calendar time was purely due to the fact that most of the work in this chapter was done as ‘filler work’ when we were waiting for materials or parts to cure.
Upon final assembly at the hangar we discovered a small issue with the emergency gear extension mechanism. We had chosen to have the rod exit the panel at the top of the IP, in the middle of the switch rack. We held off on cutting the hole for this until much later however (when we were installing instruments and switches). Upon final assembly we discovered that with the rod installed at such a sharp angle to reach the top of the IP, it was rubbing on the bottom of the elevator torque tube. We stole an idea from Bob Bittner and installed a second universal joint on the rod, just aft of the F22 bulkhead. This allows the rod to clear the torque tube while exiting the panel at our desired location.


